How to make Rolled Paper Roses!
What You’ll Need:
• Coloured Paper/thin card
• Cocktail stick or thin stick
• Scissors
• Glue Gun
• Compass or round objects of varying sizes
How to make them:
- Pick a colour card and draw a circle on it using your compass or round object. For your first rose, we want a circle around the size of the top of a mug.
- Use your scissors to cut out the circle.
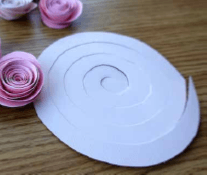
- Inside the circle, draw a spiral shape – like in the image. Start thin at the outer edge, then keep it even whilst you spiral and in the centre leave a little circle uncut.

- Heat up your glue gun, ready for step 6!
- Take your cut out spiral and a cocktail stick. Starting from the outer edge of your spiral, roll the paper around the cocktail stick – this can be a little fiddly and take a minute or two. Keep rolling until you reach the circle of paper you left in the centre.
- Remove your cocktail stick and let your spiral unfold! You should now have a spiral that wants to sit on the central circle we left, but just needs gluing in to place! Now take your glue gun and put a little blob of clue on the circle in the middle, and carefully push down the centre of your spiral in to the glue. Hold for a few seconds to dry – be careful though, the glue will be hot!
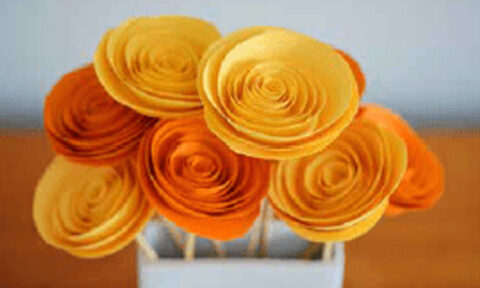
- Once the glue has dried, you have your rose! You can try making bigger and smaller ones, depending on the size of your original circle, and can even experiment by cutting your spiral out with wavy edges!
Once you have made a couple of roses, you can use them to make all sorts! Add them to hand made cards, to the edges of picture frames, or even add stems on to the bottom and use them as proper flowers!
If you would like to know more about how to adopt a child with Adopters for Adoption or would like to learn more about adoption, then please get in touch with our friendly team who will be happy to help.

